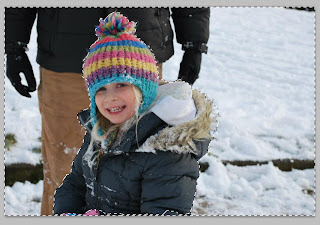
I've been teaching myself to use Photoshop for about 7 years now. A couple of times I have tried looking up a tutorial on how to do something specific, but mostly I just experiment and figure out how to do things by trial and error. I needed a photo of my daughter in the snow for a project but I only had a few to choose from. The one I liked the most wouldn't work because my husband is standing behind her....but what if I could erase him from the picture? So, this is what I did....
I opened a cute picture of my daughter that my friend Ally took yesterday...
I used the magnetic lasso to carefully trace around her
Then I went to the "select" menu and clicked on inverse.
This makes it easier to change the background without messing up the part of the picture you want to keep. The next step is going to take some practice. Click on the healing brush tool
Then I selected a place in the snow to use to cover up my husband by pressing the alt button and clicking the spot in the snow I wanted to use.
Then I used it like a paint brush. ( I didn't have to be careful around my daughter because that part of the picture wasn't selected)
I did have to be adjust my selection point several times and go over some spots multiple times to get them to look like snow. If you don't like how something turns out just click ctrl, alt, z together and it will take you back one step. (or go under the "Edit" menu and click "Step Backward.")
Eventually you should be able to remove most of the image in the background that you don't want to show. Then you can do some adjustments (lightening, contrast, brightness, ect) to get it looking how you want it.
Once you are sure you don't need to do anything more to the background (because using the magnetic lasso again can be a pain!!) you can deselect the area so you can work with the entire photo again. I went around her hat and carefully removed any stray black. I did this by using the eyedropper tool and picking up the snow color right next to the hat. I fixed a tiny spot by painting over the black. Then I moved up and used the eyedropper again to select the color of the snow in that area right next to what I was fixing. This is important to do this each time since the color of the snow changes through out the photo and you don't want a noticeable halo around your subject.
When you are done you can take the blur tool and go just around the edge to blur the edges where you painted. That way the color variations will blur together and look natural.
The picture was looking pretty much like I wanted at this point but I wanted to see if I could make the colors pop just a bit so I ran some more adjustments on the entire photo. This isn't necessary but it's usually fun. But that is a whole different post!
So....we went from this....
To this....
To this...
(I'm sure with some more practice it would look even better. )
Obviously I'm not a professional. This was my first time editing a photo this way but I was so pleased that it worked I thought I would share my experience for the other novices out there :D
Obviously I'm not a professional. This was my first time editing a photo this way but I was so pleased that it worked I thought I would share my experience for the other novices out there :D
Feel free to share any tips, changes you would make or shortcuts you know of!
Next blog....the project this photo is for!


No comments:
Post a Comment